Tag Archives: chocolate

Matzo Toffee, aka ‘Matzo Crack’

matzo toffee

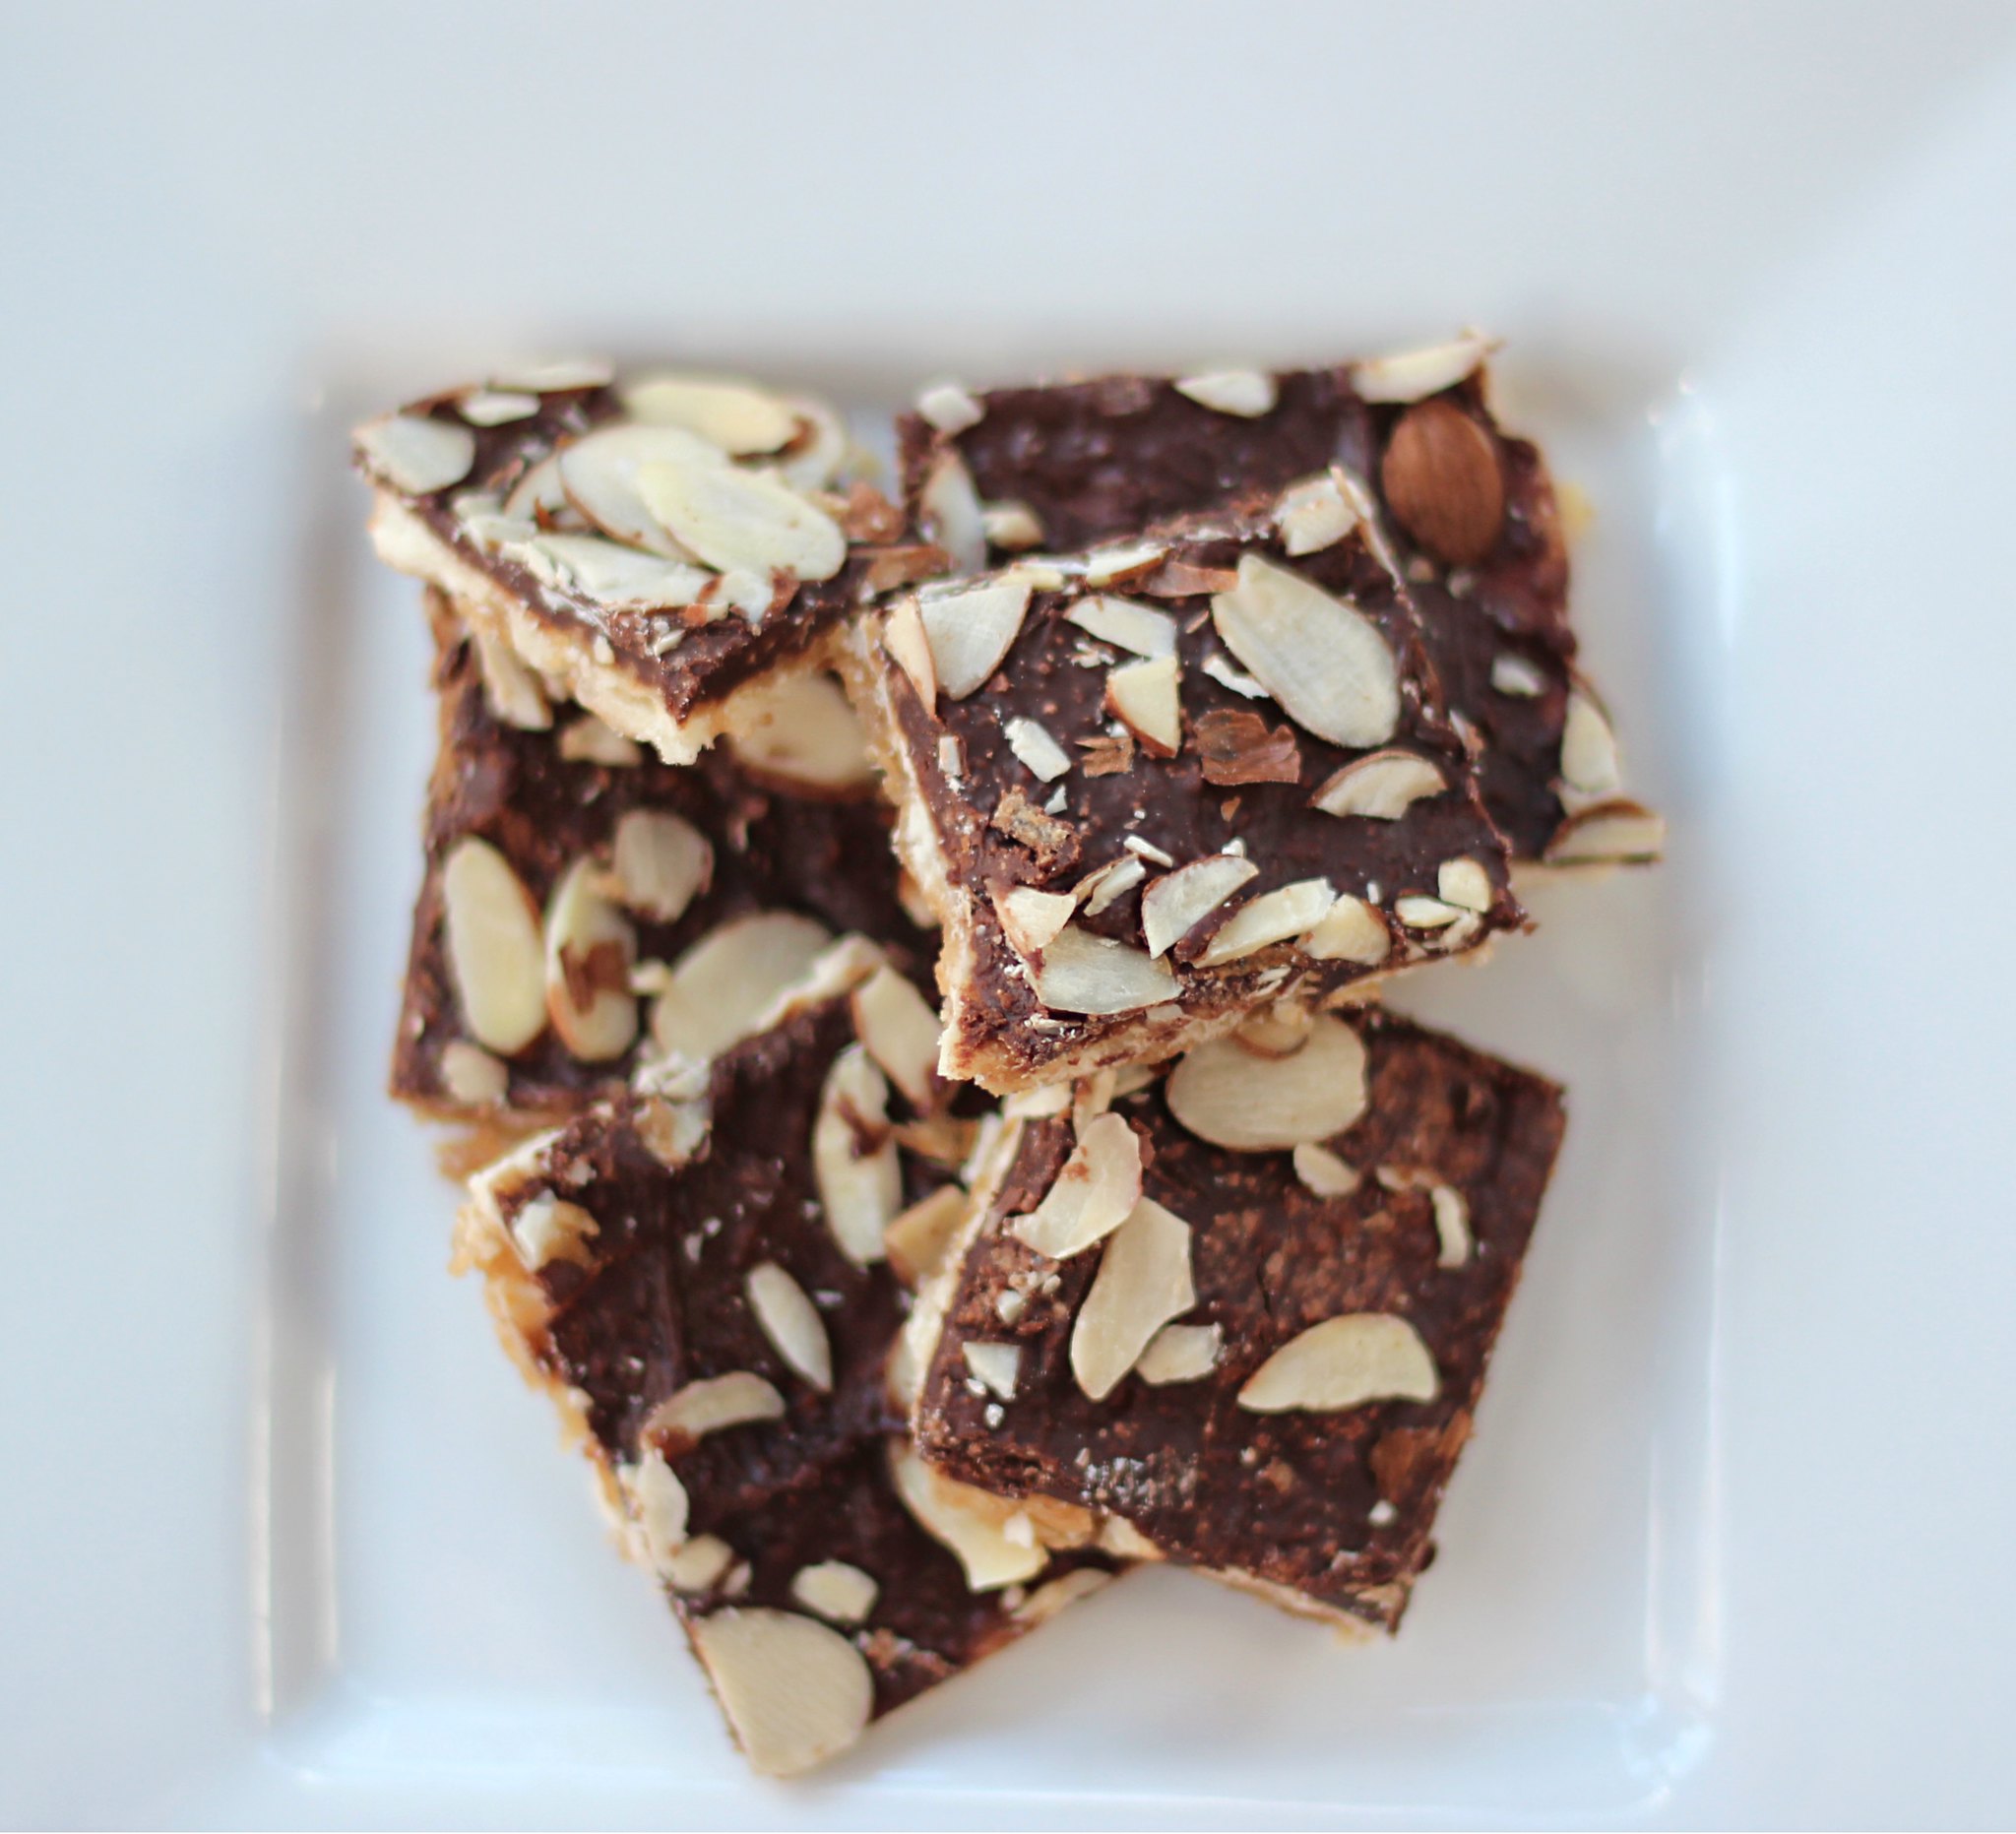
Matzo Toffee — so addictive, it’s called Matzo Crack.

“Please, Mom, can I have another piece?” “Just one more piece.” “Really, just one more? Please!!” There’s a reason that this matzo toffee is nicknamed “Matzo Crack.” It is dangerously addictive.

Matzo toffee is made with my three favorite food groups: chocolate, butter and sugar. So right away, you know it’s going to be amazing. Plus, you can make it in minutes for an easy treat for Passover or any time of the year. And it’s simple to make gluten-free by using gluten-free matzo, which actually tastes better than regular matzo. (See my earlier post on gluten-free matzo.)

I first had this addictive treat when my sister-in-law Jonna brought it for Passover one year. (Thanks, Jonna!) We’ve been craving it ever since.

Matzo Toffee, aka “Matzo Crack”

(gluten-free, dairy or pareve, Passover)
By Gluten-Free Nosh
printable recipe

Instructions:

  • 5 pieces gluten-free matzo
  • 2 sticks (1 cup) unsalted butter or Passover margarine
  • 1 cup firmly packed brown sugar
  • 2 cups (12 ounces) semisweet or dark chocolate chips
  • 1/2 cup sliced almonds
  • 1/8 teaspoon sea salt or kosher salt

Method:

  1. Preheat oven to 325 degrees. Line a rimmed 18×13-inch sheet pan with parchment paper.
  2. Arrange matzo pieces in a single layer in the pan, filling the entire pan and leaving as few gaps as possible.
  3. Combine butter and brown sugar in a medium saucepan. Cook over medium heat, until mixture comes to a boil, whisking frequently. Continue cooking and whisking for another 3 minutes until foamy. Carefully, pour toffee over the matzo and evenly spread into a thin layer with a spatula.
  4. Put pan into preheated oven and bake for 10 minutes, or until the toffee is bubbling. Remove pan and immediately sprinkle chocolate chips over top. Let the chocolate sit and melt for 5 minutes, then use a spatula to spread chocolate into an even layer. Sprinkle with sliced almonds and salt. Refrigerate until chocolate is firm, about 30 minutes.
  5. Lift parchment paper with matzo onto a large cutting board. Cut or break into 2-inch pieces. Store in an airtight container in the refrigerator.

Yield: 10-12 servings

Advertisement

Leave a comment

Filed under desserts, Jewish holidays

Chocolate Peanut Butter Bark

<a href="https://www.flickr.com/photos/glutenfreenosh/16522429215" title="chcolate peanut butter bark by Eve, on Flickr"><img src="https://farm8.staticflickr.com/7450/16522429215_49308a45cd_b.jpg" width="1024" height="1024" alt="chcolate peanut butter bark"></a>

Swirled chocolate peanut butter bark


My older daughter calls Valentine’s Day, “Chocolate Day,” because that’s mostly how we celebrate the day–with chocolate. Yesterday, I was looking for a easy, gluten-free chocolate treat that I could make as a quick after-school snack. In a matter of minutes, I whipped up this Chocolate Peanut Butter Bark.

I’ve made Dark and White Chocolate Pomegranate Bark before (actually, it was the first recipe on this blog) and ever-popular Peppermint Bark (similar thing, but with crushed candy canes instead of pomegranate seeds). So this recipe is a twist on those favorites.

You’ve got to love a recipe that has only two ingredients, comes together in minutes (other than the refrigeration time and clean-up time), looks fancy, tastes great and is naturally gluten-free.

Note: When you are melting chocolate, make sure the bowl and utensils are dry, without any drops of water. If water mixes with chocolate, the chocolate will seize and become a gunky mess when heated. Also, when using the microwave, heat the chocolate on half-power (not full-power) and remove the chocolate when it is mostly (but not all the way) melted, to prevent overheating. When you stir the chocolate, the residual heat will melt the rest of the chocolate (and if not, pop it back in the microwave briefly at half power).

What are some of your favorite chocolate treats?

Chocolate Peanut Butter Bark

(gluten-free)
By Gluten-Free Nosh
Printable recipe

Ingredients:

Method:

  1. Line a large baking sheet with parchment paper.
  2. Place chocolate chips in a large bowl and microwave on half power (such as 5 out of 10) for 1-1/2 minutes, or until mostly melted. Stir chocolate well to melt the remaining chocolate chips (if not melting, pop bowl back in the microwave briefly). Pour chocolate onto prepared baking sheet and spread thinly with a rubber spatula into a rough rectangle.
  3. Place peanut butter chips in a large bowl and microwave on half power (such as 5 out of 10) for 1-1/2 minutes, or until mostly melted. Stir well to melt the remaining peanut butter chips (if not melting, pop bowl back in the microwave briefly). Pour dollops of melted peanut buter chips on top of the chocolate. Drag the tip of a knife through the peanut butter to swirl it through the chocolate.
  4. Refrigerate for at least 30 minutes, until firm. Cut into bite-sized bark with a large knife. Note that you won’t really be sawing/cutting the bark, but rather I take a large chef’s knife, put both hands on top of it and press down on the bark to break it up.

Yield: 6 to 8 servings

2 Comments

Filed under desserts, Recipes

Super-Moist Secret-Ingredient Chocolate Cake

Secret-ingredient Chocolate Cake

You’d never guess the secret ingredient in this moist gluten-free chocolate cake with pink buttercream frosting.

Can you keep a secret? This gluten-free chocolate cake has a top-secret ingredient that keeps it rich and moist. No crumbly, dry cake here.

The only catch is that you can’t reveal the secret ingredient to your guests, at least not until after they’ve devoured a piece of this delectable chocolate cake topped with a delicate pink buttercream frosting.

Ready? Promise you’ll keep reading? The secret ingredient is … borscht. That’s right, pureed beet borscht gives the cake extra moisture and richness, without any noticeable beet taste. (Note: Do not use “Russian style” borscht, which contains garlic. That would be bad.)

Honestly, I’m not a huge fan of beets (too “earthy”), so trust me on this one: You simply cannot taste the beets in this recipe, yet they lend moistness, structure and depth to the cake. Similarly, sometimes I add applesauce to my gluten-free cakes: The applesauce makes the cake tender, and the fruit pectin keeps it from falling apart — especially important for gluten-free baking.

When I was asked to develop two recipes for the Joy of Kosher Gold’s Foods campaign, I decided to make two very different recipes: a chocolate beet cake with Gold’s borscht and wild salmon with dinosaur kale and yogurt-horseradish sauce, using Gold’s white horseradish.

For the Super-Moist Secret-Ingredient Gluten-Free Chocolate Cake, you’ll need to puree the borscht in a blender, to thoroughly incorporate any bits of beet. Borscht — beet soup — is liquidy. Adding 1 1/2 cups of borscht to the batter seems strange, but it makes the cake tender, with a light and airy crumb.

chocolate cake ingredients

The surprising secret ingredient to moist gluten-free chocolate cake is … borscht.

I frosted the cake with a pink buttercream frosting, tinted pink by a few tablespoons of pureed borscht. Again, trust me — there is so much sugar in the icing, you will never taste the beets. Using the beet juice is actually a great way to color the frosting without using artificial food colorings.

For the full recipe for Super-Moist Secret-Ingredient Gluten-Free Chocolate Cake, please click through to the Joy of Kosher site.

For the salmon, I came up with a more traditional recipe of Salmon with Dinosaur Kale and Yogurt-Horseradish Sauce. I like lacinato (dinosaur) kale, because it is more tender and quicker cooking than curly kale. My youngest daughter eats up the kale (leaving the salmon), asking for more of “the green stuff.”

Salmon with kale and yogurt-horseradish sauce

Salmon with dinosaur kale and yogurt-horseradish sauce

kale

Lacinato kale is also called dinosaur kale and Tuscan kale.

horseradish sauce

For a sauce, try this combination of Greek yogurt, white horseradish and fresh dill.

Start by sautéing the chopped kale with diced shallots in a large skillet, adding a cup of vegetable broth. Then place the salmon on top of the kale, cover the skillet and cook over low heat for about 10 minutes. The salmon (feel free to use other types of fish) comes out silky and tender, which is good because I tend to overcook fish. For the yogurt-horseradish sauce, mix together 1/2 cup Greek yogurt, 2 tablespoons white horseradish and 1 tablespoon chopped fresh dill, and serve on the side.

With a powerhouse combination of wild salmon, kale and Greek yogurt, this dish is both delicious and nutritious.

For the full recipe for Salmon with Dinosaur Kale and Yogurt-Horseradish Sauce, please click through to the Joy of Kosher site.

This post is sponsored by Gold’s and Joy of Kosher.

2 Comments

Filed under desserts, entrees, Recipes

Brown Sugar Blondies, Gluten-Free and Dairy-Free

blondies

Gluten-free, dairy-free blondies, with dark chocolate chips

A confirmed chocoholic, I always figured, why have a blondie, when you can have a brownie (especially my recipe for the best gluten-free brownies ever)? But these gluten-free, dairy-free brown sugar blondies tossed that theory out the window.

These blondies taste like chocolate chip cookies, but they are more moist and more cakey. Studded with dark chocolate chips, the blondies still deliver a strong chocolate dose, proving that maybe blondes do have more fun.

I made the blondies dairy-free by using coconut oil and applesauce, instead of a stick of butter. Be aware that the chocolate chips sink to the bottom forming a chocolatey crust; next time I will try mini chocolate chips to see if I have better luck keeping the chips afloat.

This month’s Kosher Connection challenge (see links to other blog posts below) was to make treats for mishloach manot baskets for Purim. On Purim, we have a tradition that’s the opposite of trick-or-treat: Instead of emphasizing getting food, we give friends and family gifts of food — usually a basket with at least two different kinds of foods. I thought the blondies would make a good Purim treat — dairy-free, nut-free and studded with a chocolate surprise. Also, check out my tasty, tender gluten-free, dairy-free hamantaschen recipe.

Click for Gluten-Free, Dairy-Free Blondies recipe

17 Comments

Filed under desserts, Recipes

Gluten-Free Chocolate Layer Cake

gluten-free layer cake

H with cake

We celebrated my older daughter’s birthday recently with a four-layer gluten-free chocolate cake with a chocolate ganache frosting and filling. I have to admit, it looked and tasted amazing.

I recently took a baking boot camp at Kendall College in Chicago, which gave me inspiration for creating this cake. In the class, we made an opera cake, but my daughter wanted chocolate, so I improvised from there. I started with my favorite King Arthur gluten-free chocolate cake mix. I don’t usually use mixes, but the King Arthur cake is so intensely moist and fudgy that it always elicits raves from kids and adults.

To make chocolate ganache, heat 1 1/2 cups heavy cream in a saucepan until the cream starts to steam. Then pour the cream over 10 ounces of semisweet or dark chocolate chips. Wait two minutes, then stir until smooth. Let cool to room temperature. Set aside some ganache for frosting the top of the cake. Whip the rest in a stand mixer to make whipped chocolate ganache for the filling.

To make the thin layers, I baked the cake for 15 to 18 minutes in a jelly roll pan or half-sheet pan (18 x 13 x 1-inch) lined with parchment paper. I then cut the cooled cake into four equal-sized rectangles, stacked the layers on top of each other while smoothing whipped chocolate ganache between the layers, and topped it with chocolate ganache that had not been whipped. For a distinctive presentation, freeze the cake for 30 minutes and then evenly trim the sides.

Now that’s a happy birthday!

5 Comments

Filed under desserts, Recipes

Homemade Peanut Butter Cups

peanut butter cups

Homemade peanut butter cups -- naturally gluten-free!

Recently, I made gluten-free Girl Scouts Tagalong cookies, or peanut butter pattties. We had leftover peanut butter filling, so my daughters and I decided to make homemade peanut butter cups, like miniature Reese’s peanut butter cups — naturally gluten-free and naturally delicious!

My friend Chris had sent me a recipe for homemade chocolate candy cups, with a choice of either a peanut butter or peppermint filling, and I realized we could adapt her recipe using our leftovers. I had previously bought some mini baking cups (like miniature cupcake liners) at the dollar store, so we had all the ingredients on hand for this easy gluten-free chocolate candy.

Homemade Peanut Butter Cups, Gluten-Free

(gluten-free, dairy-free)
By Gluten-Free Nosh
Ingredients:

  • 3/4 cup creamy peanut butter (I used processed peanut butter, not natural peanut butter)
  • 1/2 cup, plus 2 tablespoons, powdered sugar
  • Pinch salt
  • 2 cups milk chocolate chips or dairy-free chocolate chips
  • mini baking cups or candy cup liners, about 1.25-inches in diameter

Method:

  1. Place mini baking cups in a mini muffin tin. (Note: It is fine if the mini baking cups are smaller than the muffin tin compartments.)
  2. In a large bowl, mix peanut butter, powdered sugar and a pinch of salt until well combined. Use your hands to roll peanut butter mixture into 1/2-inch balls; roll balls quickly so your hands don’t get sticky. Set balls aside on a plate.
  3. Place chocolate chips in a large bowl. Heat in the microwave for 1 minute on half-power (such as power level 5). Stir chocolate thoroughly. If not melted, pop bowl in the microwave for subsequent 30-second intervals, stirring until chocolate is melted.
  4. Place a dollop of melted chocolate in the bottom of the mini baking cups, so the chocolate covers the bottom of the cup. Drop peanut butter balls in the middle of the mini baking cups. Spoon dollops of melted chocolate on top of the peanut butter balls. The melted chocolate should surround the sides and top of the peanut butter balls, evenly covering the peanut butter and leaving a smooth chocolate top.
  5. Stick the mini muffin tin in the refrigerator for at least 30 minutes, so the chocolate hardens. Enjoy your homemade candy!

Yield: I’m sorry — I forgot to note the yield, but it probably makes around 20 to 24 mini peanut butter cups.

6 Comments

Filed under desserts, Recipes

Gluten-Free Tagalongs, or Peanut Butter Patties

gluten-free tagalongs

Gluten-free version of Tagalong Girl Scout cookies

My daughters always have fun selling Girl Scout cookies – who can resist two enthusiastic, cute kids? I’m impressed that they sold 58 boxes each. But above all, I’m impressed that my younger daughter never complains that she can’t eat Girl Scout cookies, because they’re not gluten-free. This year, we decided to make our own gluten-free version of Tagalongs, or Peanut Butter Patties, so all of us could enjoy them.

Tagalongs were one of the girls’ top sellers this year – behind Thin Mints, of course. Tagalongs are a rich treat: a shortbread cookie topped with a peanut butter layer and enrobed in chocolate. Last year, we made gluten-free Thin Mints, so this year we decided to tackle Tagalongs. It’s a labor-intensive process — first you make the shortbread cookie dough and chill it, then bake the cookies, prepare the peanut butter topping, dip it all in melted chocolate and let it cool — but the results are worth the hassle.

My 10-year-old, who can eat gluten and who has quite a discerning palate, dubbed our homemade gluten-free Tagalongs better than the real deal. “The peanut butter is more peanut buttery, and the chocolate is more chocolaty,” she declared. My mother-in-law agreed.

On a side note, my friend Melissa (Hi, Melissa!) was upset that the cookies are called Tagalongs instead of Peanut Butter Patties. Apparently, there are two companies that bake Girl Scout cookies, and Little Brownie Bakers calls them Tagalongs, while ABC Bakers calls them Peanut Butter Patties. Glad we resolved that mystery. Next year, maybe we’ll tackle making a gluten-free Samoa!

Update 3/27/12: If you have leftover peanut butter mixture, use it to make mini gluten-free peanut butter cups, like mini Reese’s cups. See recipe for Homemade Peanut Butter Cups.

Click for Gluten-Free Tagalongs recipe

4 Comments

Filed under desserts, Recipes

Mint Fudge: The Easiest Gluten-Free Dessert Ever

gluten-free mint fudge

Gluten-free fudge is easy to make without any special ingredients.

Fudge seems rich and decadent, the kind of special-occasion sweet you might have during the holidays, or on a summer trip to the shore. I couldn’t believe how simple this recipe was and how many raves it elicited. Plus, fudge is the easiest gluten-free dessert ever. It has no flour, and no special gluten-free ingredients, so just about anyone can make it for their gluten-free guests. Another fudge fact: The recipe is egg-free, making it a good treat for friends who are allergic to eggs.

My kids had fun making this fudge, as the recipe doesn’t require any stovetop cooking (just the microwave). There was quite a lot of squabbling about whose turn it was to stir the chocolate, but we’re used to refereeing those arguments on a daily basis. My kids love mint, so we made mint chip fudge. But if you’re not a fan of mint, use 2 teaspoons pure vanilla extract instead of the peppermint extract, and use white chocolate chips or chopped nuts instead of the mint chips.

No matter how you make it (or who stirs it the longest), the dense chocolate flavor will have you clamoring for more. Cut the pieces small, so you won’t feel guilty for having more than one. You know you will.

Gluten-Free Mint Fudge

(gluten-free, egg-free)
By Gluten-Free Nosh
printable recipe

Ingredients:

  • 3 cups (18 ounces) semisweet chocolate chips
  • 1 (14-ounce) can sweetened condensed milk
  • 1 teaspoon peppermint extract
  • 1 cup mint chips (I used Andes creme de menthe baking chips, found at Target)

Method:

  1. Line an 8 x 8-inch baking pan with parchment paper or waxed paper, and set aside.
  2. Place chocolate chips in a large microwave-safe bowl (no plastic!), and heat for 2 minutes on half power. Stir the chocolate well. If there are still lumps of chocolate, heat for an additional 30 seconds or 1 minute on half power and stir until smooth.
  3. Mix in sweetened condensed milk and peppermint extract, until combined. Add mint chips and stir until chips are evenly incorporated.
  4. Pour the chocolate mixture into the prepared pan. Pat it smooth using a square of waxed paper. Refrigerate for at least two hours. Remove fudge from pan, and cut into 1-inch squares.

Yield: 64 small pieces

7 Comments

Filed under desserts, Recipes, Uncategorized

The Best Gluten-Free Brownies Ever

brownies, gluten-free

Moist, fudgy gluten-free brownies.

Without a doubt, brownies have to be the best all-around dessert. Rich, dense and fudgy, they satisfy the cravings of any chocoholic. Plus, they’re easy to make for parties, potlucks and holiday get-togethers. Most importantly — at least as far as I’m concerned — they are easy to make gluten-free, especially with this killer recipe for the best gluten-free brownies ever.

The better the chocolate, the better the brownies. I’ve made this recipe several times, but the best was when I used semisweet Callebaut chocolate, which added a deep, decadent intensity. My older daughter, who helped bake the brownies with her friend, was rapturous after she took one bite. Seriously, they are that good.

The recipe is easy to make. You can make it in using an electric mixer, or you can easily use two large bowls and mix everything by hand. (I hate dragging out my mixer and cleaning it up afterward.)

The recipe comes from Grandma, who adapted her family brownie recipe to be gluten-free. We are so lucky to have two sets of supportive grandparents who always go to great lengths to make delicious gluten-free food for us. I am thankful to have family members that “get it,” so we never have to worry about finding safe food at their homes.

A note about cutting the brownies: Before you start cooking, line the baking pan with parchment paper, so the parchment paper covers the bottom and sides of the pan. After the brownies are cooked and completely cooled (or refrigerated), lift up the the parchment paper with the brownies, put them on a cutting board and then cut the brownies into squares.

For vegan, gluten-free brownies, I’ve tried substituting one egg in this recipe with 1/3 cup applesauce, and it turned out deliciously (I ran out of eggs one day -ha!). I have not yet tried substituting both eggs, but I bet it would work well.

Click for the recipe for Grandma’s Best Gluten-Free Brownies Ever

10 Comments

Filed under desserts, Recipes

Gluten-Free Thin Mint Cookies

gluten-free thin mints

Gluten-Free Thin Mint Cookies

This year was my younger daughter’s first year in Daisies, the first-grade Girl Scouts group. She sold 48 boxes of Girl Scout cookies with enthusiastic endorsements: “They freeze well.” “They make good gifts.” “Thin Mints are the most popular.” But, because she has celiac disease and is gluten-free, she has never, ever tasted a Girl Scout cookie, nor will she.

I didn’t want her to be left out of the Girl Scout cookie feeding frenzy. So this year, I developed my own recipe for gluten-free Thin Mints, with a tender gluten-free chocolate cookie enrobed in a minty chocolate coating. It’s just the right combo of chocolate and mint, gluten-free of course.

Although it is expensive, use peppermint oil rather than mint extract, because mint extract often contains both spearmint and peppermint oils. You don’t want the spearmint taste in these cookies, just the peppermint. This recipe is a good chance to use teff flour (which I love for its high protein and fiber content), as teff works well with the chocolate flavors and the slightly dry biscuit base.

This recipe is a bit tricky, in that the batter is very soft, making it hard to form the cookies. Keep the batter chilled so it’s easier to cut out perfectly round circles. Also, chilling the cookies on the tray before baking helps them to keep their shape and reduce spread.

Enjoy!

Click for Gluten-Free Thin Mints recipe

8 Comments

Filed under desserts, Recipes